The hot new book that will forever change the way you shop online!

The hot new book that will forever change the way you shop online!
It's finally here! The book that will forever change the way you shop online for fashion, beauty and style! Click the book to learn more!

Be In Style!

Be In Style!

Find fabulous free beauty and style tips at
You won't believe what you'll discover!

Fabulous Fashion Jewelry!

Fabulous Jewelry!
where Fabulous Meets Affordable!

Get this fabulous book for half -off the suggested retail!

Cheap Chic Alert ! Save lots on beauty products!

Sephora.com, Inc.
philosophy 250x250 Shop Now

Finally! A way to figure out what you skin really needs!

Save 10 Bucks - on Great Shoes!

Here's $10 off at Shoebuy.com
Save on shoes, accessories, handbags and apparel at Shoebuy.com. We've got something for everyone and for a limited time, you can save $10 on that special something. Valid on purchase of $50 or more.

Cheap Chic Alert:

Clinique Online

Cheap Chic Alert: Buy One - Get One Free!

The Body Shop - Summer Bath & Body - Free Ship @ $60

If you haven't tried Avon you don't know what you're missing!

Avon

Thinking About Wrinkle Injections?

Thinking About Wrinkle Injections?
Learn how each of the different types compare with the QwikStyle Wrinkle Injection Comparison Chart.

Award Winner! Don't miss this one from Avon

Too Fabulous Bras - More Fabulous Prices!

Bare Necessities

Alltop

Featured in Alltop

Health, Beauty, Style: For Women Over 40!

Hide it - hide it- hide it ! Amazing concealer ...hides everything! Wow!

Benefit Cosmetics LLC

Thinking about trying Mineral Make-UP?

Mineral Make Up tips
Here are some
you won't want to miss!

Confused about which mineral make-up brands to try?

Confused Over Mineral Makeup Brands?
Discover how the major Mineral Make Up brands


Saturday, February 28, 2009

Get rid of blackheads - FAST!

by Colette Bouchez
for CountryDutchess.com

Hate those icky black dots on your nose - you know the ones that make your pores look like craters and your face look ...well..not so clean? They're blackheads - and first thing you need to know is that they aren't caused by dirt.

Blackheads are really nothing more than excess oil that accumulates in pores and turns dark when it hits the air - kind of like the way your silver jewelry tarnishes when it's exposed to air.

The Cause: While cutting down on the use of oily foundations and mineral oil based moisturizers can help, the one link that many women over-look: The connection between leave-in hair conditions and other waxy or oil based products and the formation of blackheads.

Yup, it's true! According to dermatologist Dr. Patricia Wexler, any uber-oily or waxy products that make their way to your skin can contribute to blackheads.

The Solution: Our beauty expert pals over at Allure Magazine say wash your face with foaming cleanser - that's the type that best cuts through oil without stripping your skin of vital moisture. At night, apply an acne cream containing salicylic acid ( the kind you would use on a pimple) and that will help soften the oil plugs so the pores empty, and keep new blackheads from forming.

What Not To Use: A toner! Allure says the drying action can trick your skin into thinking it needs more oil, so production goes up - and that means more blackheads rising up the surface.

For read more money saving tips and tricks visit www.CheapChicDiary.com or CountryDutchess.com for fabulous savings!


Copyright by Colette Bouchez 2009 - All Rights Reserved.
In addition to US Copyright, the text of this CheapChicDiary article is licensed under a Creative Commons Attribution 3.0 License. All
Formatting and style elements of this page are not available under this license and Colette Bouchez retains all rights in those elements.


Saturday, February 21, 2009

Instant: Deflate Under Eye Puffs

by Colette Bouchez -
For CountryDutchess.com

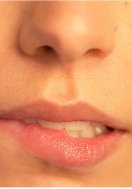
Among the most common beauty problems is under eye puffiness - you know that area just beneath the lower lid that seems to puff up like an annoying little pillow, just when you want to look your best.

The worst part: The puffier the area gets, the more it looks like you have dark circles under your eyes -even when you don't.

"The muscles and ligaments close to the eye on either side of the bridge of the nose (the area known as the “tear trough”) can, over time begin to weaken. With its support structure gone, the skin itself begins to collapse causing a kind of indentation or “gutter” effect. When the adjacent area becomes puffy, that “gutter” casts a shadow on skin making it appear as if there is a dark circle," says Dr. Ellen Marmur, chief of dermatologic and cosmetic surgery at the Mt. Sinai Medical Center in New York City.

If you pull the lower eyelid skin taunt and the darkness goes away, then you know it's purely an illusion - and not a true dark circle says Marmur, just a case of eye puffiness.

The way around it? Well first, here's what you don't want to do: Do NOT try to conceal what you think are dark circles by covering the under eye area with a light reflecting pigment in a light shade. This will make the puffs look bigger, the trough look deeper , and the shadows look darker.

Instead try these 4 QWIKSTYLE tips and say " Puffiness - BE GONE!"

1. Apply an gel specifically for de-flating puffs. Almost any product containing witch hazel is likely to do the trick, but if you don't already have a favorite, try Advanced Eye Perfector. It's under $10 and it's the single best product we've ever found for instantly deflating under eye puffiness.

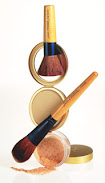
2. After the deflating gel sinks use a foundation brush to apply a thin layer of liquid, cream or cream-to-powder foundation under the eye area, in a color at least two shades darker than your foundation. Yes, you read right - go darker, not lighter. Remember, light brings things out, darkness causes it to recede. You want your puffs to recede. Once the foundation dries
( under 20 seconds) , then apply a second thin coat. Hint: Do not use a darker shade of concealer - it's too heavy for this purpose.

Hint: If can't afford to buy two shades of foundation, then you use your brush to scoop some product out from the cap of your regular color. The consistency will be a bit dryer and thicker, so the color will be naturally a bit darker. You can also add a teeny tiny bit of brown eyeshadow to your natural color foundation to make it darker - but remember, teeny tiny is the key. And mix it on the back of your hand, not in the bottle!

3. Once your foundation dries ( and it will take a little longer if you use a brush), apply a very light layer of translucent power . The goal here is take the shine down. Remember, the shinier the area underneath your eye, the more puffy it's going to look.

4. Apply your regular foundation to the rest of your face ( if you need it), and use the top of your cheekbone as the blending point between the two shades. Remember, you are only going one or two shades darker under the eyes, so the difference should be minimal. That said, be sure to blend the two colors downward, so that the darker shade under your eyes blends into the lighter shade on the rest of your face.

Extra Tip: If the area inside the "tear trough" still looks deep, try this: Use your brush to pick up a tiny bit of concealer in a color one to two shades lighter than your foundation. Using your index finger to "open" the tear trough by gently pulling under eye skin closer to your nose, use the tip of the brush to layer the lighter concealer into that "indented"area. Continue to hold the skin away until the product is almost dry - about 20 seconds. Then blend it around the edges and let the skin "snap"back into place.

The lighter color inside the crease will reflect light outwards, raising this area, while the darker color foundation under your eyes will deflate the puffs, lowering that area. Together you will have achieved a much smoother tighter under eye look which in turn will make eyes look wider and brighter.

For read more money saving tips and tricks visit www.CheapChicDiary.com or CountryDutchess.com for fabulous savings!


Copyright by Colette Bouchez 2009 - All Rights Reserved.
In addition to US Copyright, the text of this CheapChicDiary article is licensed under a Creative Commons Attribution 3.0 License. All
Formatting and style elements of this page are not available under this license and Colette Bouchez retains all rights in those elements.


Friday, February 20, 2009

7 Tips For Choosing Chandelier Earrings

by Colette Bouchez
for CountryDutchess.com

They turned from a trend to a fashion classic - and there's no sign they'll be disappearing any time soon!

We're talking chandelier earrings - and from daytime to night-time they can turn even the simplest outfit into a high styled and very current look.

At the same time not every chandelier earring style is right for every woman, or every outfit. In fact, chose the wrong style chandelier earring and you can look not only look fashionably out-of-sync, you may even look a little silly.

So how to do you know what type of chandelier earring to choose? Here a few tips that can help!

1. Never wear a chandelier earring longer than your neck. If it's touching the top of your shoulder when you're standing, it's going to be dangling into your cleavage by the time you sit down! Instead choose a style that leaves at least 1 inch of space between the bottom of the earring and the top of your shoulders.

Qwik measuring guide: Put your thumb ( nail side down) on your collarbone and extend your index finger up till it hits your jawline. Without moving your fingers take your hand away and measure the distance between your thumb and index finger. That should be about the right length for your chandelier earring - for most women it's an earring between 2.5" and 2.75" long.


2. If your face is broad or round, or if you have even a slight double chin avoid chandelier earrings with a wide bottom. Instead, opt for a longer, slimmer silhouette that elongates the face and trims your profile. Ir your face is very long and thin, give it more balance with a chandelier that offers more depth and width at the bottom.


3. You can wear a chandelier during the daytime for a bohemian casual chic look. But do choose a shorter length - no more than 2" long - and stick to plain gold or silver metals; or natural gemstones like jade or amber. Skip the sparkling crystals for daytime.


4. If you have short hair - or you're wearing your hair up in a bun - your earring should fall no lower than bottom of your jaw line. An earring that is too long will make short hair look out of proportion.


5. If your hair is shoulder length or longer, opt for a longer earring to keep the look vertical. An earring that is too short breaks the line and can make your face appear fuller. If you don't want to wear a long chandelier earring than opt for a short drop earring with single stone or bead.

6. Never, ever, ever wear a large or showy necklace with chandelier earrings. Even a strand of pearls can be "over-the-top" if your chandeliers are significant. Instead, opt for a single stone pendant, one or two fine chains, or if you simply adore beads, make sure the strand is long - at least 24 inches or more. You don't want your jewelry to compete or fight!


7. You can dramatically turn any day out into instantly glamorous evening look by simply adding a pair of chandelier earrings. For a subdued look choose either all silver or gold, or black jet stones or beads; for a pop of color match your chandelier's to your bag and shoes.

For example, dress up last year's little black dress with red chandeliers, red high heels and a red bag and you're a knock out!


All earrings pictured courtesy of CountryDutchess.com and are available in pierced or clip on ! Click on each design to learn more - or visit CountryDutchess.com for the widest selection of designer earrings in clip on and pierced!

For read more money saving tips and tricks visit www.CheapChicDiary.com or CountryDutchess.com for fabulous savings!

Monday, February 16, 2009

Gone! 10 Years Off Your Face In 10 MInutes!

by Colette Bouchez
for CountryDutchess.com

Who doesn't want to look younger, raise your hand? Ah ha - we thought so! Everyone loves the look of youth - even when you're young!

For those of us who can't afford pricey wrinkle injections or plastic surgery, there is hope! In fact, if you follow these 3 QWIK and easy steps you can temporarily take years off your appearance in just minutes! So what are you waiting for... it's a natural wrinkle treatment you can use right now!

1. Steam your skin! Yes, we know - steaming is what you do to deep clean skin and pores. But I'll bet you didn't know that steaming can also temporarily relax facial wrinkles and plump skin with additional moisture that can take years off your appearance! To steam your face, simply boil some water, and when it's bubbling, remove the pot from the stove, ( or turn the burner off) cover your head with a terry cloth towel forming a "tent" over the pot, and then place your face about 6 inches away, letting the steam reach your skin. Remain under the "tent" for about five minutes. For a super skin treatment, add some green tea to the water before boiling.

One caution: If your skin is sensitive do not put your face too close to the steam - it could burn your skin. Remain at least 6 " or more from the pot.

2. Lock It In! Apply moisturizer while your skin is still wet and steamy. This will lock the plumpness created by the steam in, so your skin will retain that relaxed, line-free look for several hours -or more.

3. Firm It Up! For extra staying power: Apply a skin -tightening gel like Loreal RevitaLift Double Lifting Intense Re-Tightening Gel plus Anti-Wrinkle Treatment - 1 Oz or a combination tightening/priming gel such as Garnier Nutritioniste Ultra Lift Serum, 1.7-Ounce Bottle These products will help keep your newly plumped skin looking firm and younger looking longer.

BONUS: Steaming will also help plump your lips and remove some of the fine vertical lines that can be aging. To keep the plump going, be sure to put on a moisturizing balm right after steaming ( try Kiehl's - Lip Balm #1, Palmers Cocoa Butter Moisturizing Lip Balm SPF 15 or Burt's Bees Lip Balm Beeswax Tube ) then top with a sheer lip gloss in shades of rose or pink, or a natural brown tone, but only if the color is very sheer.

For a natural look we love Revlon Skinlights Glosslights for Lips, 04 Topaz Skin Lights Gloss Lights ( under $5.00!) .

For a fabulous pink gloss nothing beats: Isadora Pump 'N Plump Lip Gloss in Sweet Lychee.

And here's the best part: You can use your natural anti-aging skin steam as often as you like - and, the more you do it, the more relaxed your facial lines will get - and the more plumping moisture your skin will retain!

For read more money saving tips and tricks visit www.CheapChicDiary.com or CountryDutchess.com for fabulous savings!


Copyright by Colette Bouchez 2009 - All Rights Reserved.
In addition to US Copyright, the text of this CheapChicDiary article is licensed under a Creative Commons Attribution 3.0 License. All
Formatting and style elements of this page are not available under this license and Colette Bouchez retains all rights in those elements.


Wednesday, February 11, 2009

Non Toxic , Natural Jewelry Cleaner

At CountryDutchess one of the questions we get asked the most is how to clean fashion and especially sterling silver jewelry - and folks always ask us to recommend a good non toxic or natural jewelry cleaner. Well guess what - the best jewelry cleaner in the universe cost just pennies and you probably already have it in your kitchen! It's baking soda - and here's the " recipe" that will keep your jewelry sparkling!


1. Line a glass bowl with aluminum foil, shiny side facing outward.
2. Place the jewelry you want to clean in the bowl making sure
it's touching the foil.
3. Cover the jewelry with baking soda - just enough so that you can't see it.
4. Add boiling water - enough to immerse the jewelry.
5. Let soak for 3 to 5 minutes ( or less if it's not really dirty).
6. Use tongs or a fork to lift out the jewelry ( you don't want to get burned) and rise under cold water. And
voila! You've got sparkling jewelry!

If the jewelry is very dirty or very tarnished - like silver or gold - then you may need to repeat the process so just add a little more baking soda and more boiling water - but make sure it's boiling, that's key!

This method works great on sterling, silver, gold, costume jewelry metals, even Technibond jewelry. But do be careful if you're got a lot crystals glued into a setting and limit soaking to no more than 90 seconds - or you might melt the glue. Also, don't immerse natural pearls in this solution - it's too caustic. It is however, fine for most gemstones and works wonders on cubic zirconia! And in case you're wondering ....it also works fab for cleaning silverware, silver frames or any silver home decor!

For more tips and tricks visit CountryDutchess.com
Or visit www.CheapChicDiary.com


Copyright by Colette Bouchez 2009 - All Rights Reserved.
In addition to US Copyright, the text of this CheapChicDiary article is licensed under a Creative Commons Attribution 3.0 License. All
Formatting and style elements of this page are not available under this license and Colette Bouchez retains all rights in those elements.

Sunday, February 8, 2009

Advice for A Beautiful Neck and Bustline

by Colette Bouchez - for CountryDutchess.com

The skin on the neck and decollete (the area also known as your bust line) is far more delicate than that on your face - so it often wrinkles faster and ages sooner says dermatologist Dr. Doris Day from the NYU- Langone Medical Center in New York City.

That means sunscreen is a must! But it also means that this area should not be subjected to the same kinds of moisturizers and anti-aging creams you use on your face.

Day says that treatments like chemical peels or creams with high concentrations of alpha-hydroxy acids or retinoids are a "no deal" for the neck and chest area.

The ingredients to look for she says include antioxidants with a good penetration that won't cause redness, burning or irritation. Her favorites include creams containing grape seed extract or green tea exact plus vitamins A and C.

And if you're wondering if any of those new wrinkle injections can work on the neck and chest?
They can says dermatologist Dr. Rhoda Narins, who suggests Botox works especially well for those aging "tree trunk lines" around the neck.

To reshape a double chin, she says liposuction can help - but to simply tighten some excess skin on the neck, nothing beats a procedure known as "Thermage" . It's painless, non-invasive and uses safe energy waves to tighten collagen fibers - the "cross linking" molecules that give skin it's lift.

For a smooth, even skinned bust line think about IPL (Intense Pulsed Light) treatments. It converts light into energy that in turn fades aging skin discolorations including brown spots. This can be especially helpful if your chest has seen a lot of sun exposure. To make superficial lines in your cleavage temporarily disappear, Narins suggests wrinkle-filling injections like Restylane or JuvaDerm.

For read more money saving tips and tricks visit www.CheapChicDiary.com or CountryDutchess.com for fabulous savings!


Copyright by Colette Bouchez 2009 - All Rights Reserved.
In addition to US Copyright, the text of this CheapChicDiary article is licensed under a Creative Commons Attribution 3.0 License. All
Formatting and style elements of this page are not available under this license and Colette Bouchez retains all rights in those elements.

Sunday, February 1, 2009

Match Your Moisturizer To Your Skin Type

by Colette Bouchez

Finding the perfect moisturizer is often a matter of personal choice. The scent, the consistency even the price are often the parameters by which we make our final choice.

That said you can narrow down the playing field and get better at finding the right product for your skin type if you follow a few simple guidelines.

According to Dr. Doris Day, a dermatologist from NYU-Langone Medical Center, and author of "You Don't Need A Face Lift", here's a few skin-type specific suggestions that can help.

1. For Combination Skin: Your best ingredients include botanicals, hyaluronic acid, vitamins A, C and B, and pentapeptides.

2. For Sensitive Skin: Look for ingredients like shea butter, hyaluronic acid, or pentapeptide which offer moisture without irritation.

3. For Oily And Acne-Prone Skin: Check the label for ingredients like dimethicone, salicyic acid, tea tree oil and vitamins A and C. You want to moisturizer without adding extra oil or clogging pores.

What else do you need to know? Excess oil doesn't mean you don't need moisture. A good moisturizer will help capture and trap water in skin cells, and not add a greasy layer of oil to your skin.


For the best buys on cosmetics,skin care & jewelry visit CountryDutchess.com
For more deals, steals and cheap chic advice visit www.CheapChicDiary.com


Copyright by Colette Bouchez 2009 - All Rights Reserved.
In addition to US Copyright, the text of this CheapChicDiary article is licensed under a Creative Commons Attribution 3.0 License. All
Formatting and style elements of this page are not available under this license and Colette Bouchez retains all rights in those elements.